
Hi MyVMK community! You all have such creative ideas for guest rooms that I thought I’d share some basic room building tips for those who are interested in developing their building skills or who are new to building and would like to learn more. For the seasoned builders who stumble across this written guide, I invite you to share any tips you have in the comments section below! I’m sure your tips would be helpful to the rest of the community, and for selfish reasons, I love learning about other people’s building process. Without further ado, here’s some building tips I hope you find helpful.

Adventure Is Out There! (Game Room)
I See The Light (Multi-Guest Room)
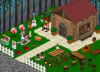
Yard Sale (Guest Room)

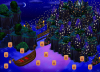
Grotto Lantern Festival Auctions (Guest Room)
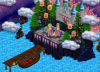
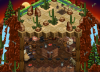
Tangled - The Ride (Multi-Guest Room)

Snorkeling in Paradise (Guest Room) / Buddy the Elf's Adventure Race (Game Room)
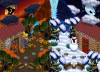
Battle of the Seasons (Guest Room)

Winter Retreat (Guest Room)

JetVMK (Anniversary Guest Room)
The Underground Saloon of Sedona (Guest Room)
Adventure Is Out There! (Game Room)
1. Use an image for reference. An image you have or find can really help navigate your build. I googled the image above on the right and used it as reference mainly for the shape of the landscape to help recall this particular scene in the movie “Up.”
2. Use the command "!lucky" to view other people’s rooms for inspiration by typing it in your text bar and clicking enter. You‘ll land in any room that’s opened to everyone, so this sometimes means you’ll find yourself in a storage or yard sale room. However, just keep using the command to look through the guest rooms. You’ll stumble across some pretty cool builds.
3. Take notes during host events! The staff always have great and creative rooms for their events. You can usually find inspiration when you attend them.
4. Check out past BGR winners’ rooms by looking through the past MyVMK newsletters. Many great builders have inspired some ideas for the rooms I’ve built. Shout out to…Leahcim, Question, Kcoop, and many others who inspired some of my building projects.
1. The reality is that building is expensive but that shouldn’t stop you from creating an awesome idea you have for a room! Play the mini games (especially on double credit days), do staff quests, and trade to build your credits. With patience and determination, you can build something great. ")
I See The Light (Multi-Guest Room)
2. Utilize the myVMK Discord channel for trades. For those furni items you need that are always available in the shop catalog, ask if other players have extra of those items that they wouldn’t mind selling to you at a discounted rate. Chances are you’ll find someone who’s willing to clear space in their inventory and sell those kind of items at a discount. With that said, when it comes to looking for items in general, please don’t harass other players if you know they have any item(s) you want, but they haven’t expressed interest in selling it yet. Just be patient, and hopefully in time, you’ll have what you need.
Yard Sale (Guest Room)
3. Go to pop-up yard sales! I’ve gotten a lot of my furniture from yard sales. They won’t always have what you need, but if they do, you can respectfully haggle for a price that you and the seller are both comfortable with. You can look up items on the forums and on Discord to see what they’ve sold for in the past, or ask for a value check of the item on Discord if you can’t find a past price listed for it.
Grotto Lantern Festival Auctions (Guest Room)
4. Repurpose furniture. Use furniture from an old room you built and add it to the new one you’re making. Your old room won’t have those items anymore, but if you no longer have use for the old room, you just saved yourself some credits by reusing furniture. (i.e. A lot of the furniture items in the "Grotto Lantern Festival Auctions" room was taken from the "Tangled - The Ride" room, which is pictured below.)
Tangled - The Ride (Multi-Guest Room)
5. Work with building partners! Working with a partner is especially great if you’re creating a multi-guest room experience. Depending on what you and your building partner decide on contributing to the project, you can save some credits by splitting costs on items you both don’t have but need for the room(s). Also, it’s just more fun building with a partner and bouncing ideas off one another. Shout out to my girl, ComicGabi, who was my awesome building partner for this multi-guest room ride.
1. First, know that patience is key! I can’t tell you how many times I’ve remodeled some of my rooms, but if you stick with it, you’ll eventually finish and be happy with how it turned out overall.
2. Always configure! All the rooms, I’ve built have more than one configured item in it. What this means is you’re simply arranging an item to be below or above the 0 plane. This function is usually what helps your creative vision come to life.
3. Utilize the shift key to save time while building. It will help you quickly add multiples of one item to your room, as well as swiftly remove any item from your room. To quickly add multiples of one item to your room, hold down the shift key, select the furniture and click "place" (be careful not to select "sell all"!). Continue to hold the shift key down and click around the room to place multiples of the item. To remove items, hold the shift key down and click the items you want removed.
Snorkeling in Paradise (Guest Room) / Buddy the Elf's Adventure Race (Game Room)
4. Reuse a design/“floor plan” of an old room and apply it to your new build. For example, I configured the carpets in the summer guest room pretty much the same way I did in my winter game room I made before.
Battle of the Seasons (Guest Room)
5. Completely cover your canvas - especially if you’re building in the empty dark ride room! This means make sure the sides and corners of your room are filled by either walls, carpets, or furniture. This gives your room a more complete and finished look. I typically start laying things down from the back of the room and work forward. This makes it a little easier to cover up all the space in the room. If you can see your carpet all the way to the wall flats in the back of the room, lay your back carpet down first and then place the wall flat on top of it. You may also have to increase the configuration of your wall flat to cover the empty spaces at the top of the room if it doesn’t hide the empty spaces at a 0 configuration. Remember before you lay down any wall flats or carpets to first set up ride teleporters if you want guests to be teleported into your room as soon as they enter. Side note…hide your ride tracks (not ride starts if you need people to click on them) under carpets if they aren't integral to the design of your room by giving them a negative configuration. This will also contribute to providing your room with a clean look.
Winter Retreat (Guest Room)
6. Don’t shy away from using themed rooms. They can really add to the ambiance of what you’re building!
JetVMK (Anniversary Guest Room)
7. Use furniture in unconventional ways to creatively display your vision. It’s good practice to do this especially if you want to do well in the anniversary room building competitions that pretty much require you to use furniture in unconventional ways since you’re limited to what you can build with. Question is really talented at doing this. Check out their work here.
The Underground Saloon of Sedona (Guest Room)
8. Create dimension. Configuring your furniture is key. Here’s how to create a 2 story room with an accessible bottom floor:
- Start by laying down your 2nd story carpets at a 0 configuration.
- Then increase the configuration of each carpet to however tall you want the 2nd story floor to be.
- After you’ve finished configuring your 2nd story carpets, evenly place your 1st story carpets at a 0 configuration on top of the 2nd story carpets.
- Then decrease the configuration of the 1st story carpets so that they fall below the 2nd story carpets. Your avatar should now be able to walk around the 1st story with a 2nd story above them.
- Once you’ve finished configuring the stories, you can start placing furniture in the room. If you want furniture on the 2nd story increase their configuration. Just know if you place a walkable pixel on the 2nd story, your avatar will hop to the 2nd story when they step in that spot where the item was placed. To be able to still walk around on the 1st floor, I recommend you place 2nd story furniture on top of 1st story furniture and configure the 2nd story furniture from there.
Whew! That was a mouthful. Good luck!
9. Last but not least, get recognized for your hard work! Submit your masterpieces for quarterly BGR competitions! You can submit your room(s) here. By the way, don’t be too hard on yourself if you don’t win. Just keep building and submitting. There were a couple rooms I submitted for the BGR competitions in which I did not win, but eventually I won all three categories.
That’s all the tips I have for now! If any more come to mind, I’ll make sure to update this forum. If you have any questions about building, please feel free to ask below and either I or someone else in the community will try to get back to you. Good luck with your build! You got this!
Last edited:


